from grist.org. What's next, legal rights for trees? *grin*
----------------
We Hold Its Value to Be Self-Evident
Ecuador approves new constitution granting inalienable rights to nature
Ecuador approved a new constitution this weekend that, among other things, grants inalienable rights to nature, the first such inclusion in a nation's constitution, according to Ecuadorian officials. "Nature ... where life is reproduced and exists, has the right to exist, persist, maintain, and regenerate its vital cycles, structure, functions, and its processes in evolution. Every person, people, community, or nationality will be able to demand the recognition of rights for nature before the public bodies," the document says. The specific mention of evolution isn't accidental; besides being an activity nature arguably likes to do anyway, evolution as we know it has close ties to Ecuador's territory of the Galapagos Islands, where Charles Darwin formed his famous theory. Ecuador's constitution grants nature the right to "integral restoration" and says that the state "will promote respect toward all the elements that form an ecosystem" and that the state "will apply precaution and restriction measures in all the activities that can lead to the extinction of species, the destruction of the ecosystems, or the permanent alteration of the natural cycles."
sources: Nature, The New York Times, The Washington Post, The Community Environmental Legal Defense Fund
Tuesday, September 30, 2008
Saturday, September 27, 2008
Quilt Labels and clipart
I want to first off apologize for not blogging for so long. I have a good reason - I've been recovering from a kidney infection and haven't been up to much more than watching an excessive number of DVDs of television shows (Bones, StarGate, Nero Wolfe). I seem to be better now, so I'm back...
I'm almost a month late in shipping Quantum Lake off for its exhibit. The holdup was getting the label done and printed. I got the label(s) done today so I'm sharing my process as I've always gotten good comments about how nice my labels are. If you want to see a picture of Quantum Lake, I posted one on June 9 here on my blog.
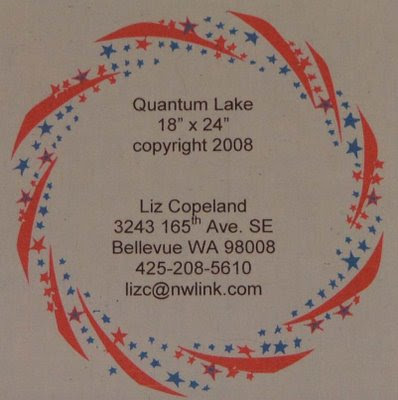
I do my labels in Word using ClickArt from Broderbund to create the art around the label. Here's the 2 different labels I came up with for Quantum Lake so you can see what the end product is before I start talking about the details of the process. The backing fabric is various blue stars, so one version of the label is done on light blue fabric with stars around the text.

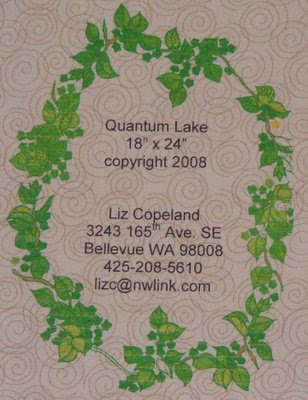
Quantum Lake itself has a combination of nature photos printed on fabric and a batik fabric that has spirals on it. So the second label echoes those design elements.

How did I create them? It's actually quite easy if you have some clipart borders available. The key thing to remember is that I create the text first in a Word document. Then I add the art that goes around it. I've never been able to edit the text once I add the art, so it's important to get the text done first. I often use a sans serif font because that's easier to read once it's been printed on fabric. I center the text, have the top line down about 2 inches from the top of the document so as to leave room for the surrounding border, and I generally size it at 18 or 20 for the font size. Once I've typed in the label text, I save the document so I can delete any art I add and get back to the basic text.
Next, I browse my clipart disk. Once I select a border or other art that I want to use, I insert the art by clicking on Insert on the top menu bar. I select Picture, and From File, then click on the image I want. (Side note: I got ClickArt 125,000 as a Christmas present years ago and have never felt the need to upgrade. There are several versions reviewed on Amazon and available for quite reasonable prices. ) Once I've inserted the art, I click on it and select Format, then select Picture. The options I always use are Behind Text, and Center because I center my text. Invariably, the art is the wrong size, so at this point I click on the lower right corner and drag it the right size. Then I reposition it if needed. If I like the result, I save the file and I'm done. Otherwise, I delete the added art and go look for something I like better.
This time, I did 2 versions and I'm still deciding which will actually go out on the quilt. Total time today to create the 2 label files, fuse the fabric to wonderunder and print, then blog about it: 2 hours 45 minutes.
I'm almost a month late in shipping Quantum Lake off for its exhibit. The holdup was getting the label done and printed. I got the label(s) done today so I'm sharing my process as I've always gotten good comments about how nice my labels are. If you want to see a picture of Quantum Lake, I posted one on June 9 here on my blog.
I do my labels in Word using ClickArt from Broderbund to create the art around the label. Here's the 2 different labels I came up with for Quantum Lake so you can see what the end product is before I start talking about the details of the process. The backing fabric is various blue stars, so one version of the label is done on light blue fabric with stars around the text.

Quantum Lake itself has a combination of nature photos printed on fabric and a batik fabric that has spirals on it. So the second label echoes those design elements.

How did I create them? It's actually quite easy if you have some clipart borders available. The key thing to remember is that I create the text first in a Word document. Then I add the art that goes around it. I've never been able to edit the text once I add the art, so it's important to get the text done first. I often use a sans serif font because that's easier to read once it's been printed on fabric. I center the text, have the top line down about 2 inches from the top of the document so as to leave room for the surrounding border, and I generally size it at 18 or 20 for the font size. Once I've typed in the label text, I save the document so I can delete any art I add and get back to the basic text.
Next, I browse my clipart disk. Once I select a border or other art that I want to use, I insert the art by clicking on Insert on the top menu bar. I select Picture, and From File, then click on the image I want. (Side note: I got ClickArt 125,000 as a Christmas present years ago and have never felt the need to upgrade. There are several versions reviewed on Amazon and available for quite reasonable prices. ) Once I've inserted the art, I click on it and select Format, then select Picture. The options I always use are Behind Text, and Center because I center my text. Invariably, the art is the wrong size, so at this point I click on the lower right corner and drag it the right size. Then I reposition it if needed. If I like the result, I save the file and I'm done. Otherwise, I delete the added art and go look for something I like better.
This time, I did 2 versions and I'm still deciding which will actually go out on the quilt. Total time today to create the 2 label files, fuse the fabric to wonderunder and print, then blog about it: 2 hours 45 minutes.
Monday, September 8, 2008
Yes! magazine for Fall 2008
I'm back from a two week vacation, out from under the accumulated pile of mail, chores, and souvenirs, and I ended up taking a week to recover from a kidney infection. Not fun. The last couple of days I've felt good enough to get caught up on reading the magazines that have been patiently waiting for me and I wanted to recommend this issue of Yes! magazine. From the many articles dealing with Purple America and where we can agree on many things to the final tidbit about how to pick an electric bike, it's packed with interesting and informative and upbeat, even optimistic, good stuff. Check it out online if you haven't looked at it yet. Go to http://www.yesmagazine.org/
Labels:
going green,
renewable energy,
transportation
Subscribe to:
Comments (Atom)