I'm almost a month late in shipping Quantum Lake off for its exhibit. The holdup was getting the label done and printed. I got the label(s) done today so I'm sharing my process as I've always gotten good comments about how nice my labels are. If you want to see a picture of Quantum Lake, I posted one on June 9 here on my blog.
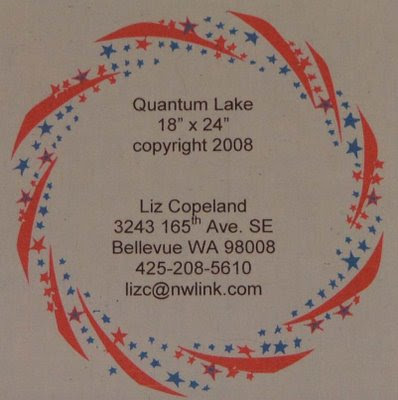
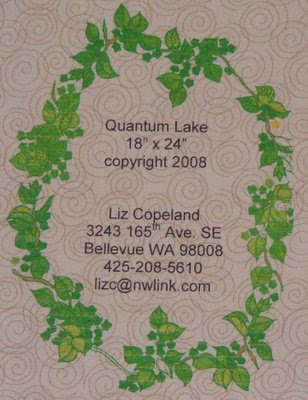
I do my labels in Word using ClickArt from Broderbund to create the art around the label. Here's the 2 different labels I came up with for Quantum Lake so you can see what the end product is before I start talking about the details of the process. The backing fabric is various blue stars, so one version of the label is done on light blue fabric with stars around the text.

Quantum Lake itself has a combination of nature photos printed on fabric and a batik fabric that has spirals on it. So the second label echoes those design elements.

How did I create them? It's actually quite easy if you have some clipart borders available. The key thing to remember is that I create the text first in a Word document. Then I add the art that goes around it. I've never been able to edit the text once I add the art, so it's important to get the text done first. I often use a sans serif font because that's easier to read once it's been printed on fabric. I center the text, have the top line down about 2 inches from the top of the document so as to leave room for the surrounding border, and I generally size it at 18 or 20 for the font size. Once I've typed in the label text, I save the document so I can delete any art I add and get back to the basic text.
Next, I browse my clipart disk. Once I select a border or other art that I want to use, I insert the art by clicking on Insert on the top menu bar. I select Picture, and From File, then click on the image I want. (Side note: I got ClickArt 125,000 as a Christmas present years ago and have never felt the need to upgrade. There are several versions reviewed on Amazon and available for quite reasonable prices. ) Once I've inserted the art, I click on it and select Format, then select Picture. The options I always use are Behind Text, and Center because I center my text. Invariably, the art is the wrong size, so at this point I click on the lower right corner and drag it the right size. Then I reposition it if needed. If I like the result, I save the file and I'm done. Otherwise, I delete the added art and go look for something I like better.
This time, I did 2 versions and I'm still deciding which will actually go out on the quilt. Total time today to create the 2 label files, fuse the fabric to wonderunder and print, then blog about it: 2 hours 45 minutes.
5 comments:
These turned out so nicely!! Thank you so much for posting to the QA list about it.
Thanks for the info on creating a label in Word. I used to make beautiful embroidered labels but decided they were way too much trouble so your method looks very attractive to me.
I never know what I will learn through QuiltArt!
Wow these are great .....
I wouldn't have thought of doing my label in Word but now I will, thanks
I can give you some hints on how to be make the label and still be able to edit the text whenever you want. Drop me a line if you are interested.
Glad you are feeling better, its not fun to be ill.
Thanks all, for the nice feedback!
Meg, I looked for an email address for you on your blogger profile but couldn't find one. Can you contact me with contact info? I'd love some hints on how to edit the text after I've laid the art in there...
Post a Comment